
How to Draw Mulan. Mulan is a 1998 lively film considered one of the best-animated movies Disney has ever made.
Also, check our cats coloring sheet.
The film is about Mulan and her adventures and is packed with great characters, animation, music and story moments.
It proved so widespread that the film generated sequels and even a contemporary live-action remake. Drawing Mulan can be a great way to show appreciation for this amazing character.
If you are a big fan of Mulan, you will love the tutorial we have prepared for you!
How to Draw Mulan
Step 1
Like most characters in Disney animated films, Mulan is very realistically detailed and proportioned. We will keep this in mind as we work on this guide on how to draw Mulan.
Let’s start with her face outline along with her flowing hair. It would be easier to start with his face outline, so let’s draw him with a curve with a very small point at the bottom of his chin.
Next, we can use some wavy curved lines for the parting of her hair on the right side, and it will also frame the side of her neck, as shown in the reference image.
Next, use some similar wavy lines on the left side of her head for the other side of her hair going down.
Finally, draw some rounded lines from the bottom of his head for this step. These lines form the neck and the beginning of the chest Mulan. Then we are ready for step 2!
Step 2
Now that you’ve outlined her face and hair, we can start drawing her shoulders. First, draw a few lines outside the collar of the top she’s wearing. Once drawn, we will draw his shoulders.
To draw them, add some curved lines running down the sides of the collar you drew.
These lines will go down quite a bit, as in a later step, and they will transition into his arms which will hold something.
Step 3
Now we’re going to extend her arms further and add a little more of her body in this step of our how-to-draw Mulan guide.
First, draw a flat, rounded shape for the top of the garment that will wear it around the waist. Then a ribbon is tied around her waist, and you can draw that with more rounded lines.
You can use a few more curved lines to flow outwards to complete this garment.
Try your best to get them in the same position as our reference image. In the next step, we draw a teapot that they are holding in their hands.
Step 4
In this guide, we’ve mentioned a few times that Mulan will be holding a teapot, and now it’s time to draw it! At the same time, we will also add facial features to your Mulan drawing.
First, use some fine lines for the teapot handle that fits in your hands. The teapot then has a lid with a wide top that tapers down.
Once we’ve drawn this teapot, let’s draw its face. We’re going to draw his eyes, eyebrows, nose and mouth to create the expression he has in this rendering. Then it’s time for the finishing touches!
Step 5
Before we colour your artwork, we must finish the final details in this step of our how-to-draw Mulan guide.

Use curved lines that flow outward to draw the skirt of her dress as it looks in our reference image.
Finally, let’s draw her feet coming out from under her skirt. Then you can draw a background or add some movie elements or characters to complement it!
Step 6
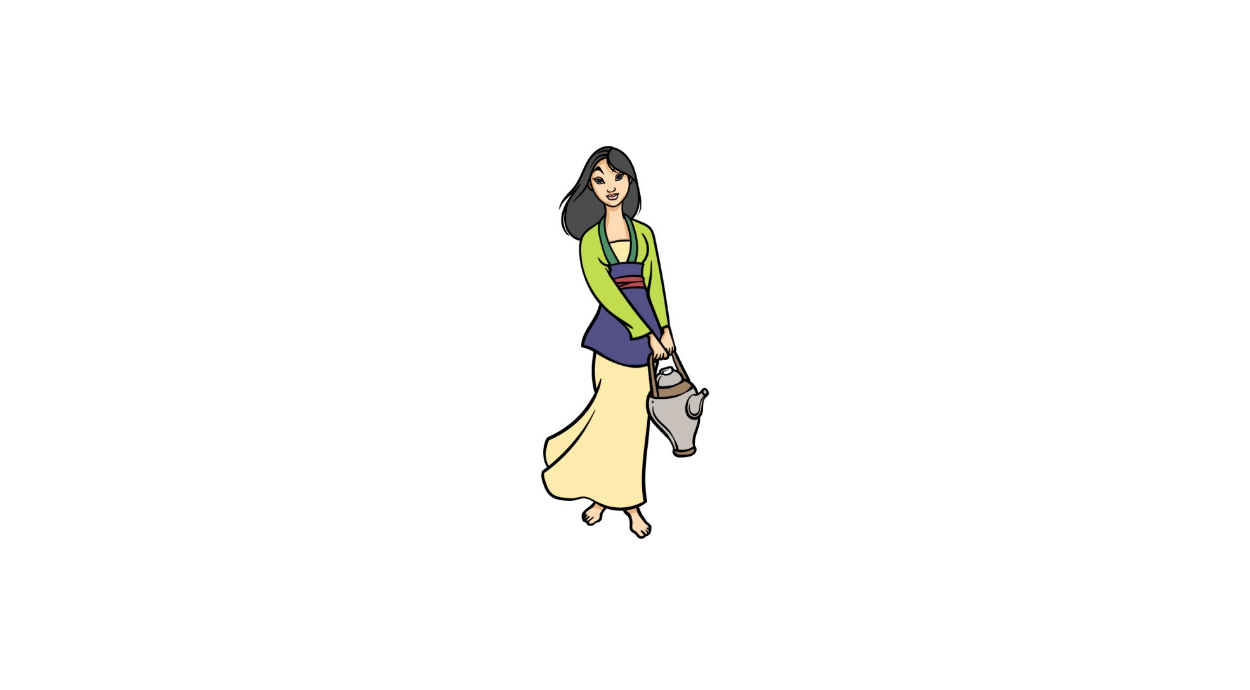
In our sample image for this drawing of Mulan, we kept the colours exactly how they looked in the movie.

We used shades of green for her bodice and purple and red for the waist dress. We ended up choosing a light beige for the skirt of her dress.
Will you choose similar colours in your drawing, or will you change them? We can’t wait to see the colours and mediums you use to complete this amazing Mulan drawing!
Your Mulan Drawing is Finished!